|
LIGHT MOUNTAIN TERRAIN |
|
|
Approximately 30% of the Iranian countryside in the theater is covered with light desertish mountainous terrain comprising of light brownish rock. Here you will learn how to tile this terrain well for it to look as realistic as possible. You will also learn how to avoid common mistakes involved in the creation of this specific terrain type and learn how to improve upon the phase 1 tiling that may contain some of these mistakes. It is very possible to make this terrain look realistic from high altitudes . This is what the Balkans terrain team accomplished with the Korea textures, and I have no doubt that we can equal or even surpass their work. |
|
|
Randomizing Terrain |
|
|
|
|
|
This is basically what you start out with... the same texture of light brown mountain terrain repeating itself over a wide expanse of terrain above 4000 feet relative to sea level. It doesn't take Albert Einstein to see that this looks very unrealistic. |
This is how the terrain looks after it has been randomized. As you can see, the terrain looks much more realistic now. It looks a lot like Janes F-15. |
|
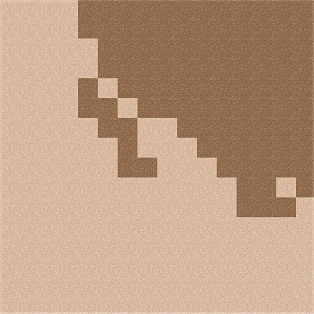
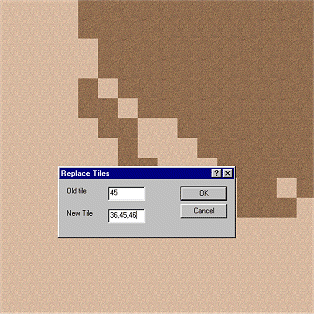
Randomizing the terrain is the process of replacing one terrain tile with many (even hundreds if you wished). The theater has been pre-tiled to allow the phase 1 tilers to know what type of terrain to tile in certain elevations. This section focuses on the light mountain terrain of western Iran. If you look at the two pictures above, you can get and idea of how much better the terrain looks when it has been randomized. (please ignore the desert sand beneath the light mountains, it will be used to illustrate terrain transitions later on but should not be randomized with the light mountains ;) If you are improvising upon phase 1 tiling and the terrain has not been randomized, you can do the same thing. Randomizing Procedure: 1.) Click on one of the dark mountain tiles in the segment display - this will allow for Terrainview to recognize that you have selected the dark mountain terrain. 2.) Click on the "REPLACE" button in the segment display - this will allow for Terrainview to replace this single tile with several. 3.) The window that appears should ask for the new tiles that you wish to replace the old tile with. The tiles are identified by number offsets in terrainview so you need to enter in the number offsets of all of the other light mountain terrain textures that you are provided. This means you will be replacing one tile with many. Copy and paste (Ctrl-c and Ctrl-v) the numbers below into the "NEW TILE" box. You should be pleased with the results! 36,45,46,1821,1822,1823,1824,1825,1826,1827 4.) After randomizing, you may notice that there are some tiles that are used in the light mountain terrain that were not included in the above list for randomizing. These tiles were not included because if they were repeated over the segment, they would create quilt-like patterns like in the Korea terrain. You should also go into the 3d view and see if there are any cliffs to put some of these tiles to good use! Use these tiles (ones with surface irregularities and such) by "sprinkling" them over the terrain... don't overuse them. |
|
|
Terrain Transitions |
|
|
|
|
|
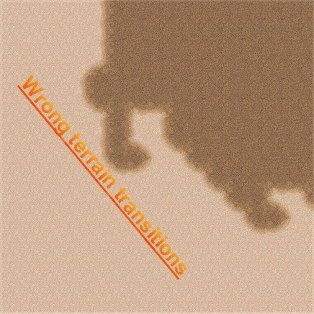
Notice how the transition tiles in this segment seem to look straight and very unnatural? This is exactly what we are trying to avoid. |
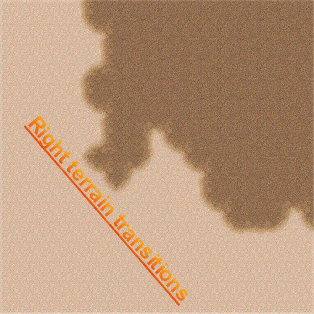
Notice how more attention was paid to making the transitions rounder and more irregular than the picture on the left? This is what we are aiming for... terrain transition tiles placed irregularly to reduce repetitiveness |
| Terrain
transitions need to be flexible. Do not confine them to the exact
boundaries set by the pretiled terrain. It is important to avoid placing
the same type of border tile together more than 2 times because this will
make repetition obvious. I want to see transitions that look like what is
found in nature: something jagged, irregular, and unpredictable. The two
pictures above serve as a guide for tiling these transitions so that they
look as realistic as possible. If you are improvising phase 1
tiling and the terrain transitions are not tiled properly, then you should
fix them. Use the 3d view to check to see that the transitions do not look
awkward elevationwise.
Transition Tips: 1.) Transitions should be round and irregular. Squareness is not acceptable. 2.) View the transitions in the 3d view window to see if they look realistic or not from the third dimension. 3.) Use all the terrain transition tiles that are provided... (number offsets below) Light mountain to Desert transition tiles: 32,33,34,35,37,38,39,40,41,42,43,44
|
|
|
Terrain Variation |
|
|
|
|
|
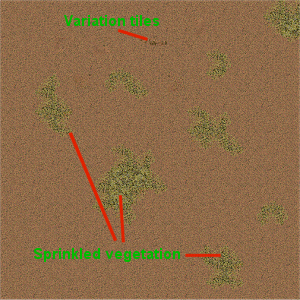
The light mountain terrain that lacks a great deal of rivers can have surface variation tiles and sprinkled vegetation. |
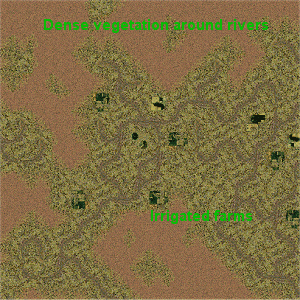
Add in variation tiles into areas with a great deal of rivers as seen above. You can also place some irrigated farm tiles along the rivers for even more realism. Be sure to sprinkle vegetation in the surrounding desert too so that your work looks even more realistic. |
| Variation will be key to making this terrain look good as about 50% of the theater is covered in it. Adding in variation can make low altitude flying much more immersive and exciting and it will give the player a good sensation of speed. Add some variation to every segment of the terrain you tile, but do not overuse variation tiles or else your terrain will end up looking cluttered like Korea. In areas where there is scattered vegetation (refer to regional land type map), you should follow the same guidelines for randomizing terrain textures and creating terrain transitions. Here are two examples of completed segments which show scattered vegetation and irrigated agriculture. | |
|
Mountain Rivers |
|
|
|
|
|
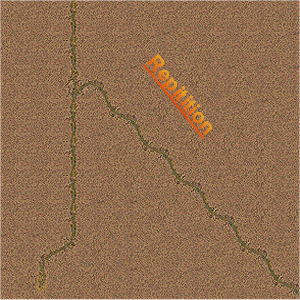
Notice how these rivers look straight and unrealistic? Well... Falcon's terrain engine does not allow for really realistic looking rivers without a lot of branches or curves in it... look at the example on the right. |
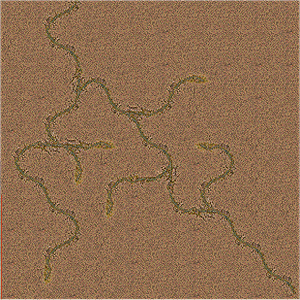
Notice how the rivers look more realistic? They are curvier and more branchy. This should serve as a model for what your work should look like. Tiling rivers should take a while... around 5-7 minutes per segment. Keep in mind that the phase 1 tilers are focused on quantity, not quality. You are focused on quality, not quantity. We only want premium quality work, and you should not rush. |
| Here is an example of what rivers should look like. Straight lines are what we are trying avoid here at all costs. In nature, rivers are naturally branchy, curvaceous, and unpredictable. You can change the shape of the rivers and add little branches to them to make them look realistic. Try to avoid putting two horizontal/vertical river tiles next to each other or you will create a repetitive effect. Keep in mind you do not need to tile all of the rivers. ARE TOO MANY RIVERS IN THE CURRENT L2. Most rivers in the theater are supposed to be seasonal. Those that are seasonal can be covered with regular light mountain base tiles to delete them or you can use dried riverbed tiles on them (when tiling with the dry riverbed tiles, tile them as if they were rivers so you can make sure that they are branchy and curvaceous). In my opinion, I think the riverbeds look even better than the rivers. Use the 3d view to check to see that the rivers do not look crazy elevationwise (IE running uphill). | |
|
Medium Altitude Cities |
|
|
|
|
|
City tile without transitions... it looks very blocky indeed. |
Add in transition tiles to the city to make the terrain look realistic. This creates an effect of thickening of population as you fly toward the center of the city. |
| Cities
are quite easy to tile. They look realistic too :) Make sure that the
cities look reasonable and are not too repetitive. You can randomize city
tiles with these offsets
1712,1713,1714,1715,1716,1717,1718,1719,1720 |
|
|
Contact |
|
| This guide to tiling light mountain terrain was written and illustrated by T-Bone, the head of the Q.A.P. Team. All questions and comments can be sent here. | |
|
©2001 - 2002 F4ME. All rights reserved. |
|
